In this article, you will be guided to configure a Sales Pop campaign. Each campaign can be assigned to one notice type.
Go to Campaigns tab, here display the campaigns created. Admin can add, edit, delete, enable/ disable and customize the content of campaigns
For each campaign in this page, you can Edit, view Report, Notifications and Enable or Disable them. 
I/ Create campaign
To create campaigns, click on Create, the page will display Create campaign popup
1. Step 1 - Select type
Here admin will choose the type of campaign. There are 4 purposes: Recent activities, Information, Review, and Custom
In each campaign type, you can choose child type. For example, Choose "Recent activities" support the following popup types:

2. Step 2 - Choose Source
Step 2 is selecting the data source to create your campaign.

3. Step 3 - Confirmation
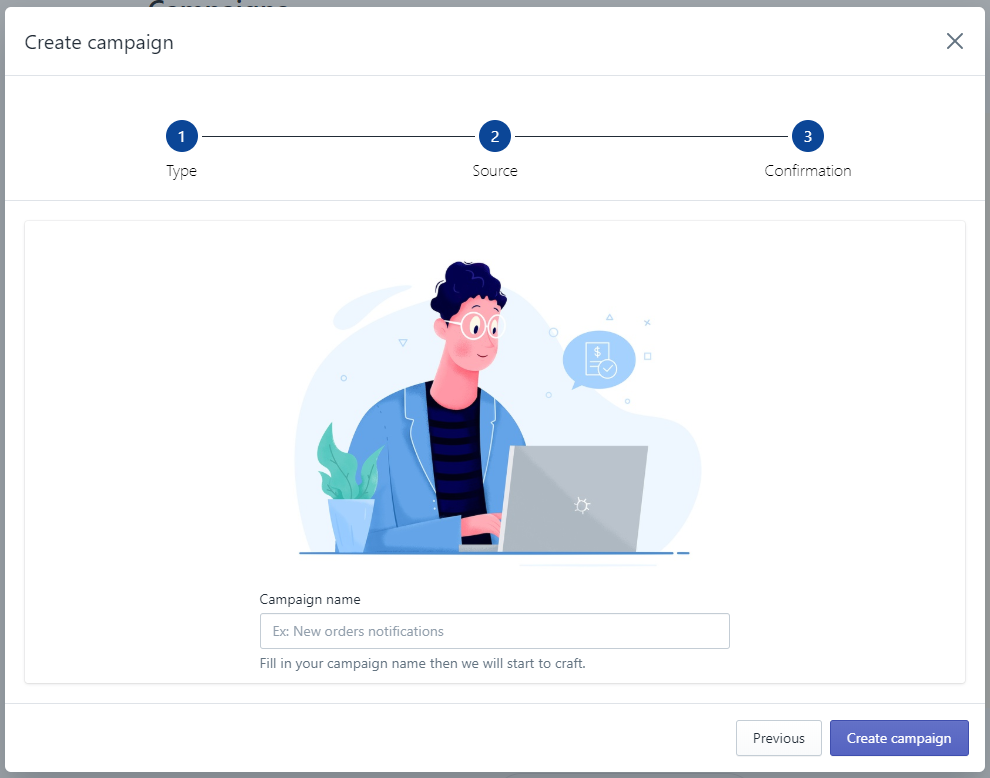
Enter the Campaign name here to confirm your campaign.
II/ Edit campaign
To edit any campaign, just click to it.
1. Step 1 - Configure general information
Here you can configure the following information of campaign:

- Campaign status: You can turn on/off campaign
- Campaign name: Enter the name of the campaign
- Template
+ Heading text: Enter the popup title that you want to display in the campaign
+ Content text: Enter the popup content that will be displayed in the campaign
- Manage variables (Only support on Purchase notice and Custom notice): At Heading text click on Manage variables then it will display the Manage variables popup
+ Check Use dynamic names to be able to customize the customer name. Enter the values on each line.
+ Check Use flag as country option to replace the country name with the flag in the popup heading

- Image:
+ Choose image shown on popup
+ Select Use product image to show product photo on popup
- Static maps: Click Use static map to display the map instead of the product image (Only apply for Purchase notice and Custom notice campaigns)
- Language: Select the display language for the "time ago" text
*With campaign Information Notice, customers can click to the popup and be redirected to a link inserted here:

2. Step 2 - Select source
Here you can choose the data source for your campaign. Each campaign can have a different source.

3. Step 3 - Select themes
Here display the popup themes, with Basic Themes and Seasonal Themes.

4. Step 4 - Custom design
4.1 Choose Layouts
Here displays the Popup Layout available for store owners to use and save their time alot.

4.2 Choose Color

- Background color: Click to select the background color for your Popup
- Heading color: Choose a color for the Popup title.
- Text color: Click to select the color for content displayed in Popup.
- Time color: Choose the color for the time displayed in Popup.
- For the campaign Statistic pageviews will have an additional Counter Color and Counter Unit Color fields:

4.3 Choose Typography

- Font family: Select the font for the content displayed in Popup
- Heading font weight: customize the weight of heading text
- Heading font size: customize the size of heading text
- Content font weight: customize the density of content text
- Content font size: customize the size of content text
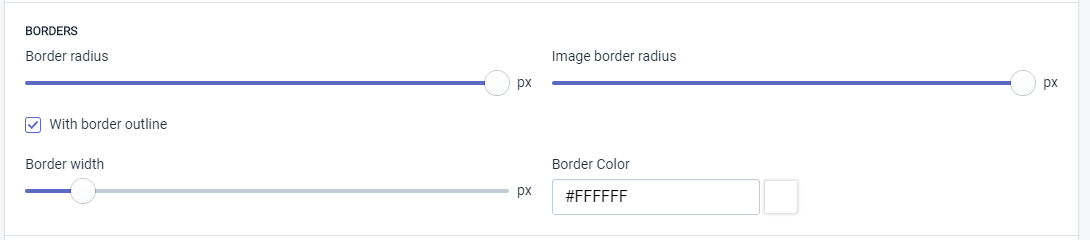
4.4 Select Border
4.5 Enable Box-Shadow
Check to enable box-shadow display for Popup
4.6 Design Heading
Here, adjust the heading highlight, including 4 types: None, Underline, Overline, Line through

4.7 Hover Settings

- Hover product name decoration: Select the display method for product names in Popup when customers hover on it
- Hover product name color: Select the color that will display when customers hover on the product name in Popup.
5. Step 5 - Custom the display of Sales pop

Check Overwrite settings values to customize individual display for each campaign.
5.1 Select Position
- Appearance: Select the display location for Popup on Desktop:
+ Top right: Popup displays at the top right of the page.
+ Top left: Popup displays at the top left of the page.
+ Bottom right: Popup appears at the bottom right of the page.
+ Bottom left: Popup displays at the bottom left of the page.
- Truncate content tex
Check to shorten the content in the popup when it's too long.
5.2 Setup Display duration
Enter the time allowed for Popup to appear on the page. After this period, popup will be auto-disable
5.3 Configure how sales pop shown on mobile
- Mobile position: Select the displaying position of Popup on mobile
+ Top: Popup displayed at the top of the mobile device.
+ Bottom: Popup displayed at the bottom of the mobile device.
6. Step 6 - Setup Triggers
Similar to this guide: http://support.avada.io/support/solutions/articles/47001137474-how-to-configure-popup-triggers-and-custom-css-